Where do you keep all the information you need to run a reading group? My reading instruction needs to be organized and timely. I use reading binders for small-group instruction. I am a reading interventionist, and I have between 11 and 14 small groups a day. My favorite system to keep up with all the details have been reading binders.
What Have I Tried in the Past
In my first year as an interventionist, I tried to use a tub to gather my materials. I was doing my running records and anecdotal notes on a program on an iPad. I put the other materials in a file folder that lay in the tub. My lesson plan I put on top of the materials. The system was not very organized. I was always digging in the tub to find what I needed. I made charts for my groups by stapling sheets of paper together. When I needed a chart, I had to hunt through a stack of charts to find the correct one. I knew I needed a change.
I still use a tub to gather materials, but I made two big shifts when I switched to using binders. One was that I began to use notes. While I loved the idea of paperless, I had trouble recording well on the iPad, so I could see all the information to glean my next teaching point. I also quit using paper charts.
Reading Binders for Small Groups
What I needed was one place to store all my materials. I decided that putting everything together in a binder would help. This is the set of binders I use because they were affordable and of good quality. Each group has a different binder. Here are the different elements of my reading binders for small group instruction.
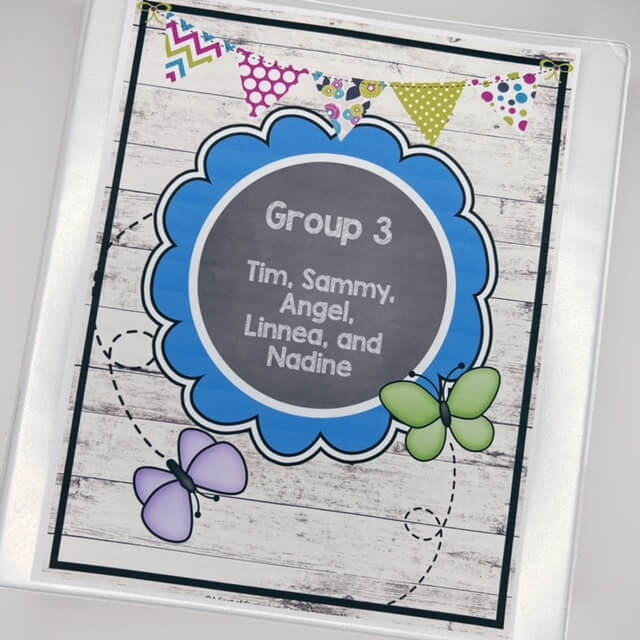
- Cover – I put a cover on the binder with the student's names on it and grade levels. I change covers often as groups are adjusted, but that works for me. It also helps me know at a glance who is in the next group.
- Anchor Charts – I began to make my anchor charts on an 8.5 by 11 sheet of cardstock. They are not as large as the charts I previously used, but I realized that everyone at the table could see them in my small reading group. This allows the charts to live in the front pocket of my binder.
- Lesson Plan – The first tab is the lesson plan for the week. Since I sometimes do not get all the way done with my lesson in the allotted time, this allows me to make notes for the following day.
- Assessments and Notes – I normally put assessments and running records in this section. This allows me to have them ready to assess my students. I normally do not have time to thoroughly review the assessment right after I administer it, so I write the student's name on a sticky note. This allows me to go back and review during my planning time.
- Phonics Games and Review Sheets – My intervention program is a pull-out program, so I am on a tight schedule. Occasionally I have a few extra minutes, and there isn't enough time to begin a full activity. I keep appropriate activities to fill a few minutes.
- Sight Word Cards – I always keep extra sight word cards and blank cards. There are sets of sight words that are taught with certain lessons. Sometimes we run out of prepackaged sight words, so I keep extra copies. I also like to have extra blank cards for when a student is having trouble with a word that the series has not pointed out.
- Classroom Library Checkouts or Practice Books – My last tab in my reading binder is a notes sheet. I record when a student checks out a book from my classroom library.
I hope this walkthrough of my reading binders was helpful. This system is successful after two years of tweaking it. I just kept adding more tabs. I am finally comfortable with this very functional reading binder.

This site contains affiliate links. This simply means if you buy something using our link, we will receive a very small portion of the sales. The price of the item is the same whether it is an affiliate link or not. It is our promise to you that we only recommend products or services we believe will add value to our readers. By using the affiliate links, you are helping support our Website, and we genuinely appreciate your support.

